
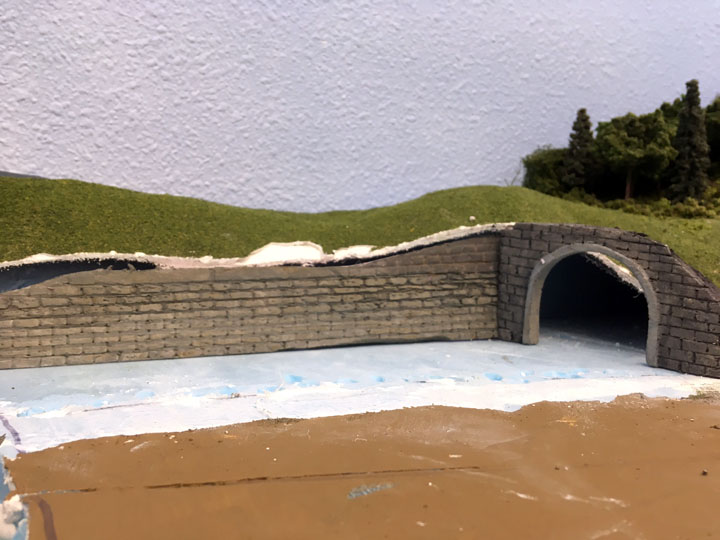
My good friend Michael Rose made some suggestions on changing the layout for the vehicle tunnel that I planned to run though Misti Mountain. His suggestions are good in that re-routing the road and moving the tunnel will make the layout more usable. Here is the way the area looks before starting the rework:
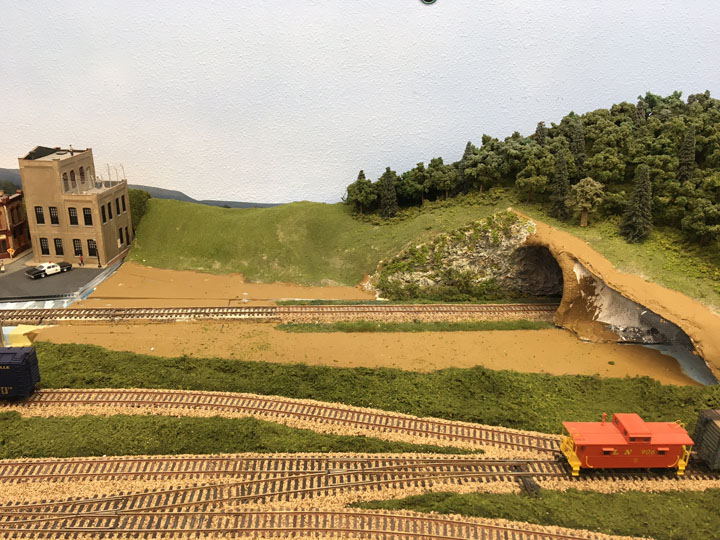
The vehicle tunnel is on the right with the tan surface is where the road originally was going to go through the mountain. Michael told me he thinks that this looks unnatural and I agree with him. I’ll seal up the vehicle tunnel and re-locate it elsewhere.

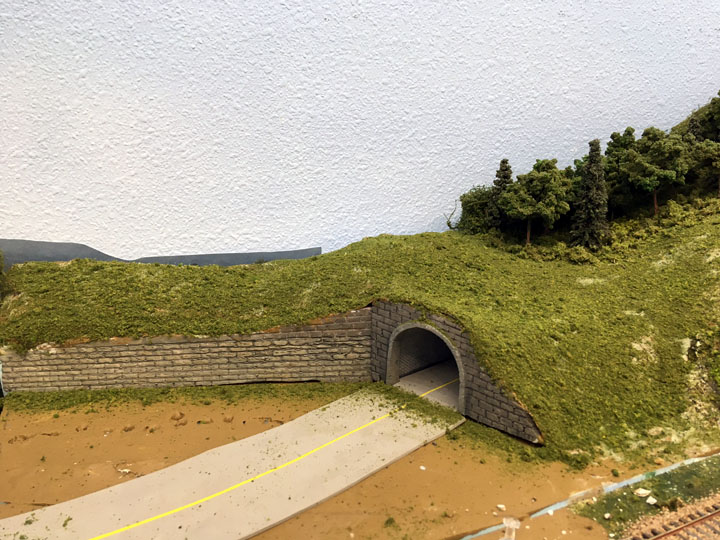
I decided to have the vehicle tunnel just to the left of Hoovertown behind the doodlebug track (in front of this picture).
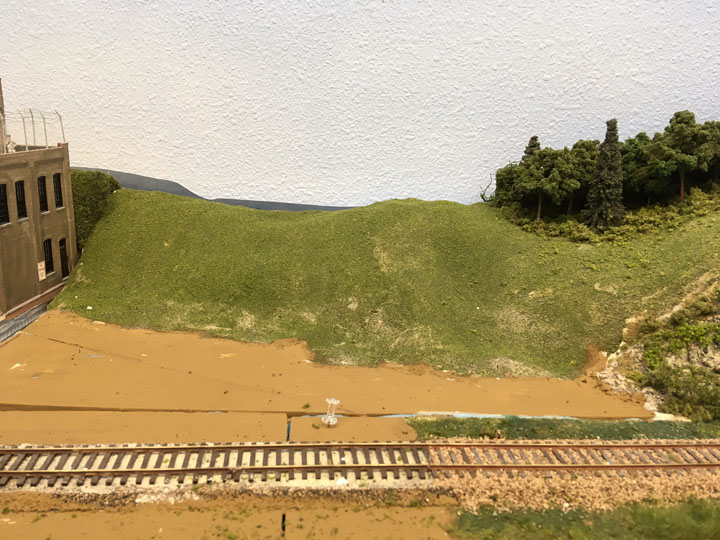
Since Hoovertown is so close I want to cut into the mountain with as little dust and mess as possible.
I also want to get rid of the crowded area by the back door of the jail.

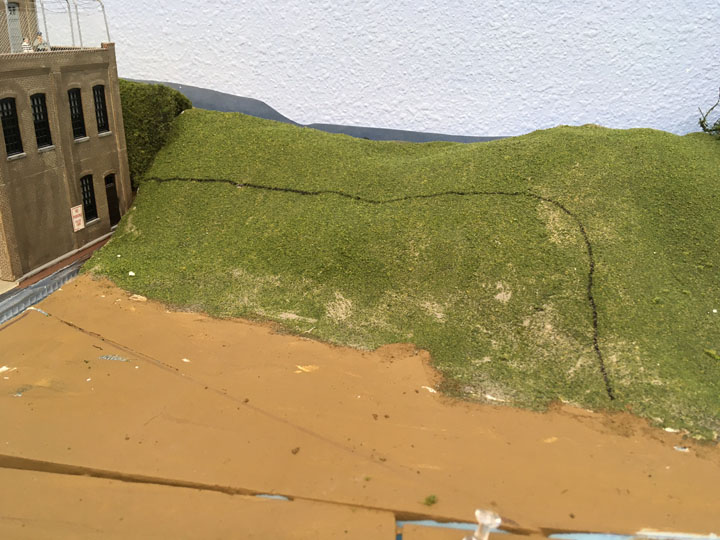
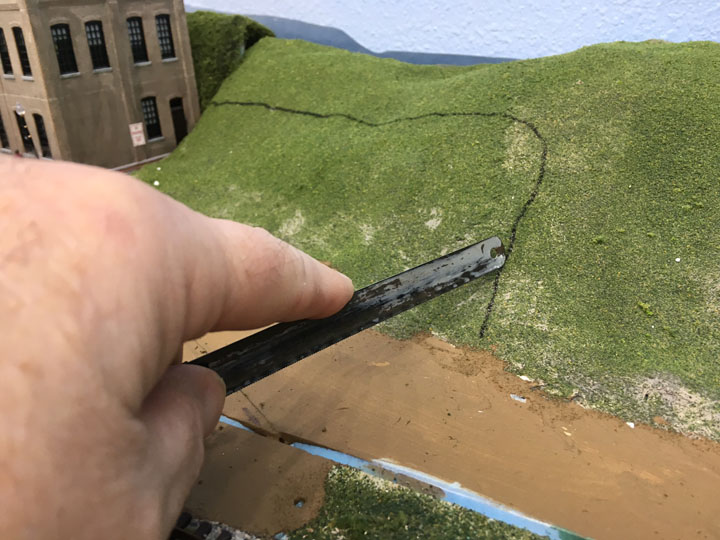
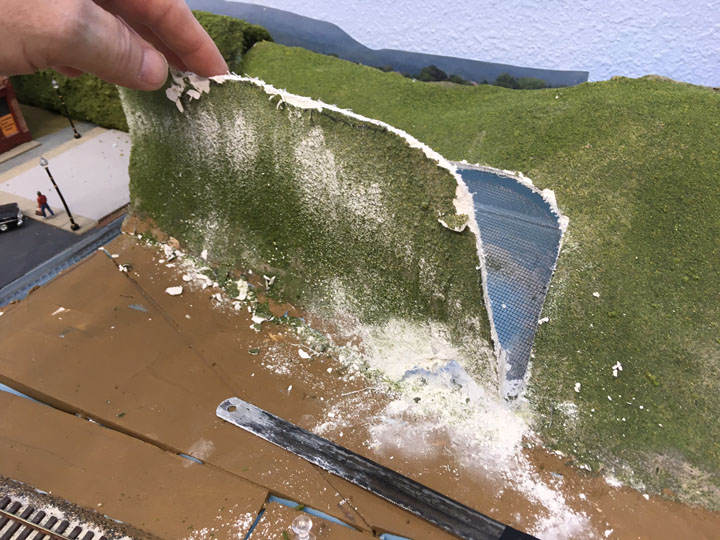
To accomplish my goal I’ll need to cut though the plaster and metal screen mountain roughly along the black line.
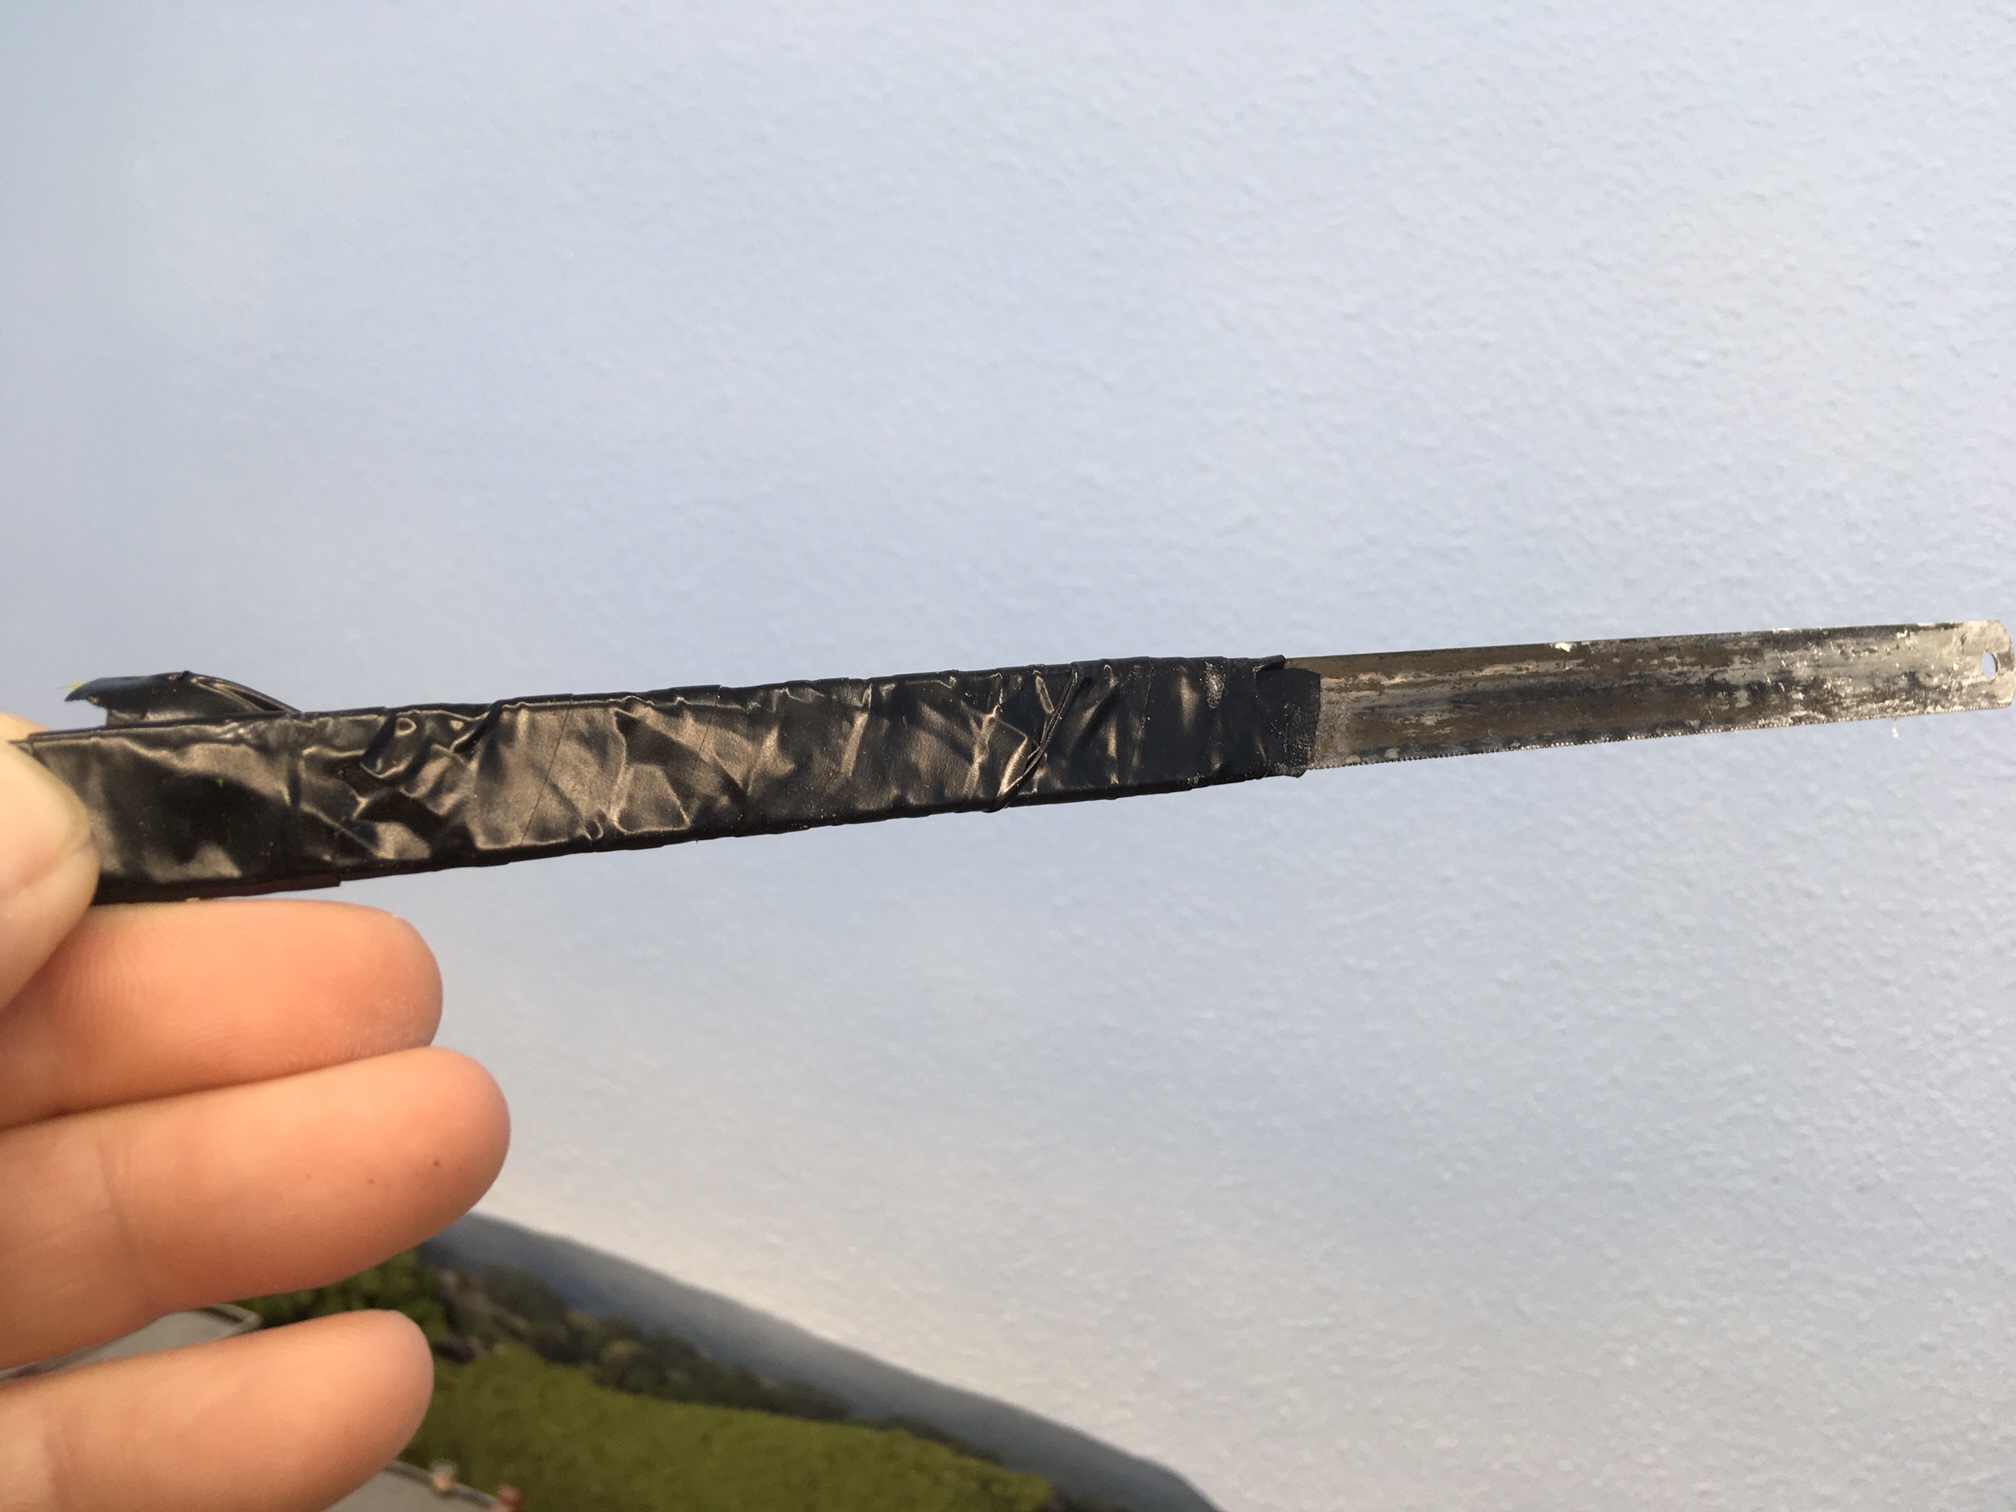
I was going to use my electric rotary tool with a cutoff disk but that would create WAY too much dust so instead I’ll use a hacksaw blade. The black electrical tape wrapped around part of it is to make it easier on my hand.
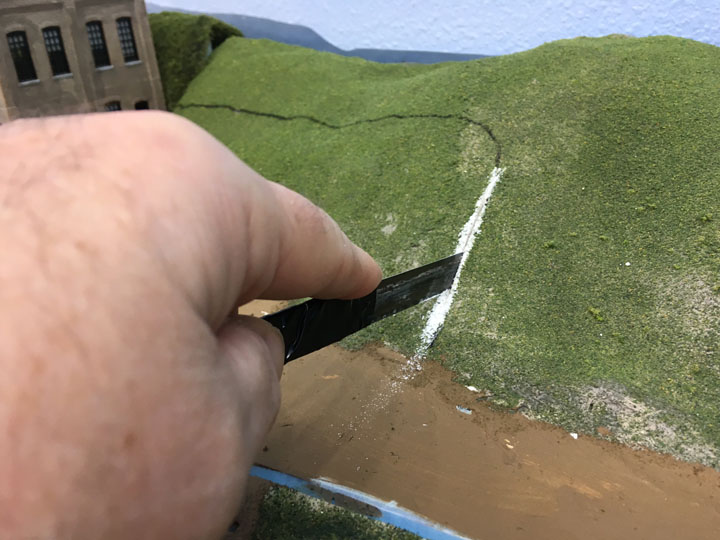
I started the cutting by just drawing the blade along the surface. It didn’t take long to cut through the surface.
Whatever dust that was created by the cutting stayed in place instead of flying around the room.
Here the cut has been completed. It took me about 2 minutes to complete.
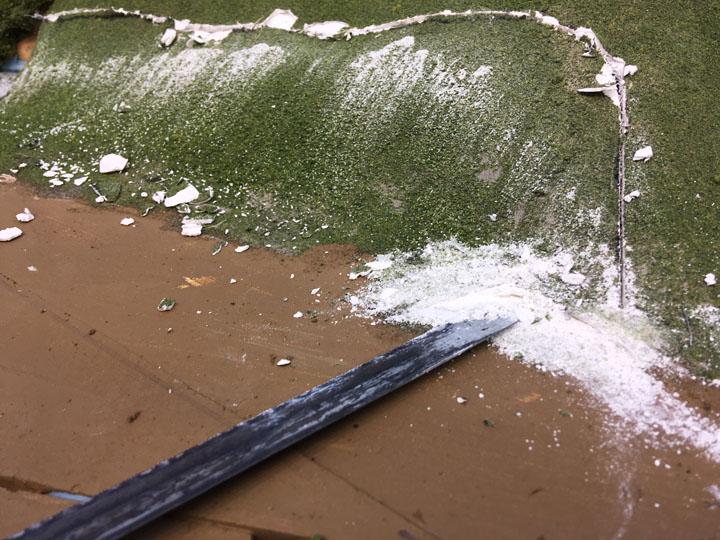
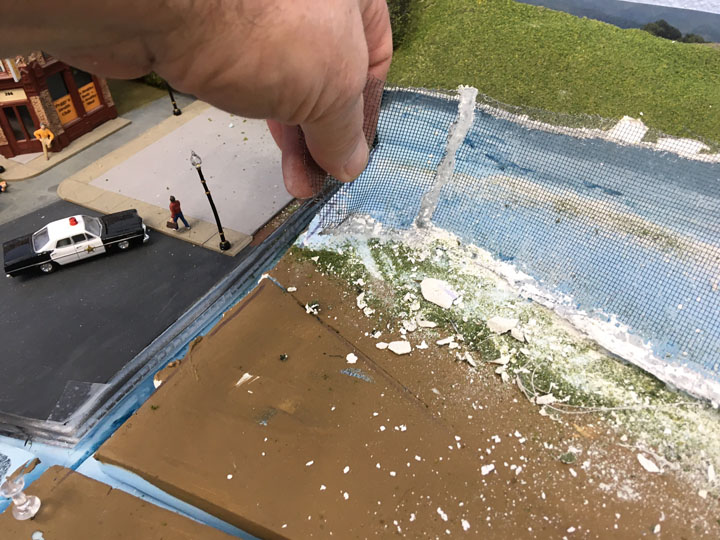
I thought that I would need to cut along the bottom where the portion was attached to the foam, but that wasn’t the case. I simply pried it away and it came off the foam easily.
I was left with the metal screen portion which somehow (surprise!) was able to poke a hole in a finger. I just pulled it away from the foam.
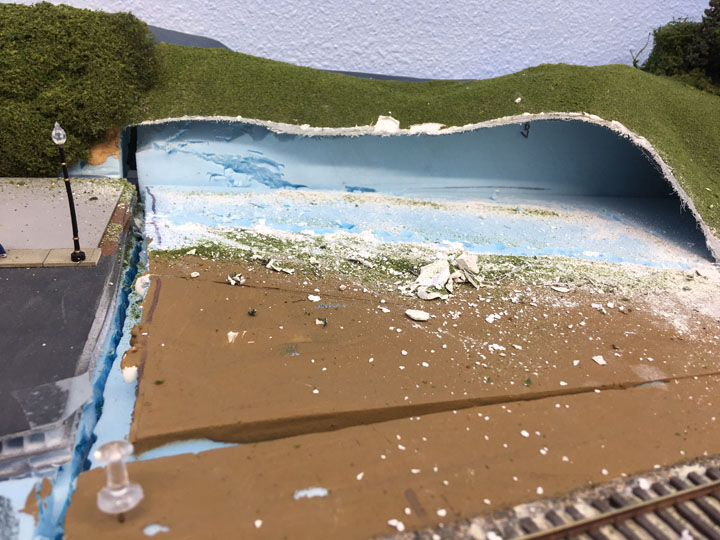
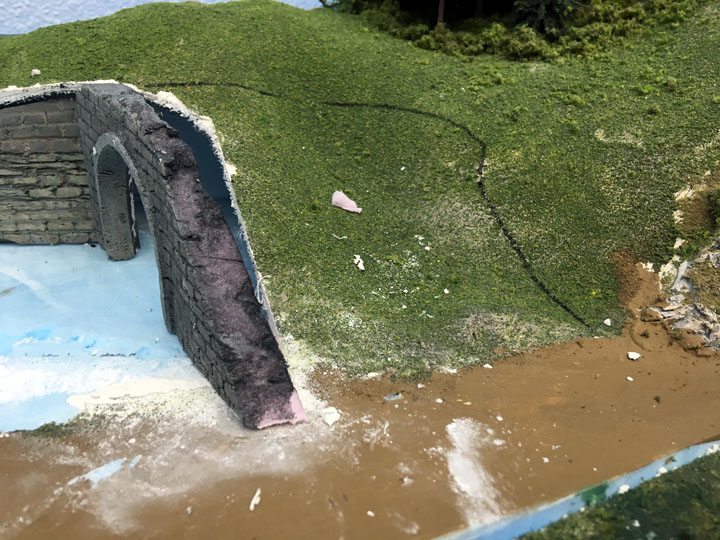
Here’s the section with the area cut away. Next I’ll start adding a tunnel portal and walls leading up to it.
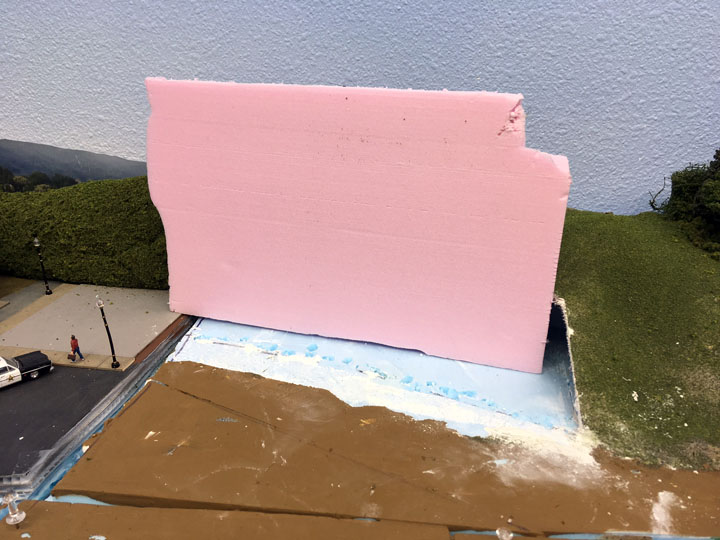
I looked as using Woodland Scenics(tm) wing walls; however, I wasn’t happy with the work necessary to cut up and fit the pieces so I decided to make my own wing wall and portal by carving foam. Here I put a piece of foam in place and trace along the back of it with a marker to get the rough shape.
Here you can see the wing wall and what will be the portal.

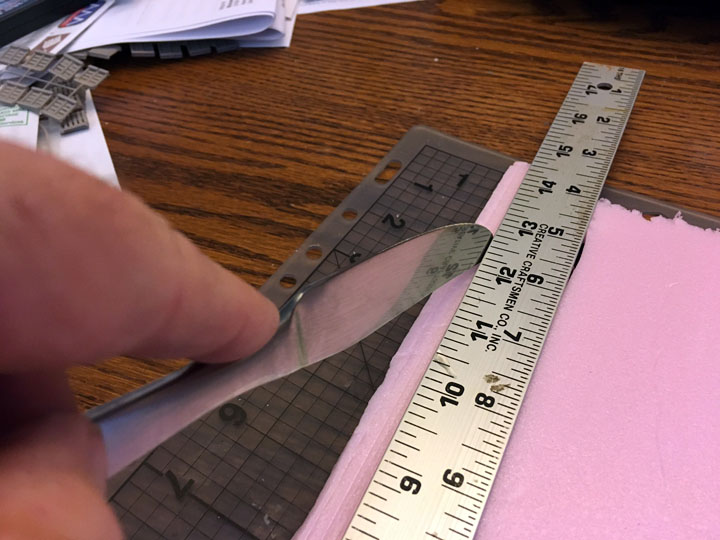
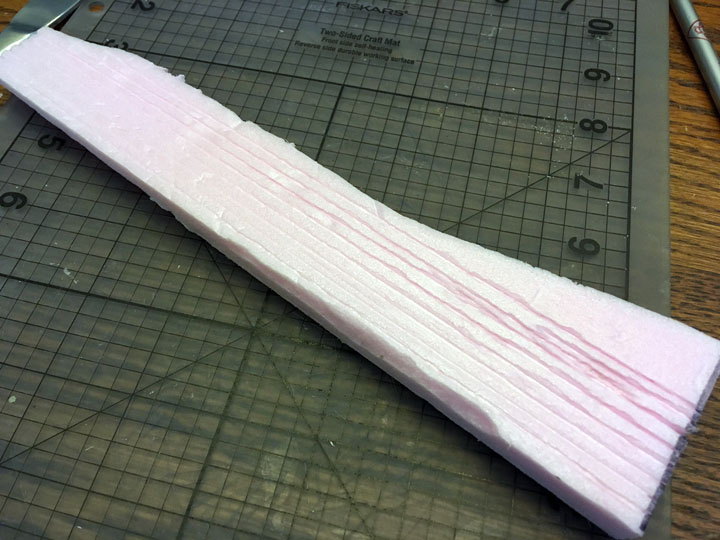
I use a ruler and the back of a knife to scribe the horizontal lines in the foam. You can see more about this technique of scribing foam in an article that I did for the May/June 2010 Model Railroad Hobbyist magazine.
I messed up a little on the one end but I’ll cover it with hanging vines once installed.
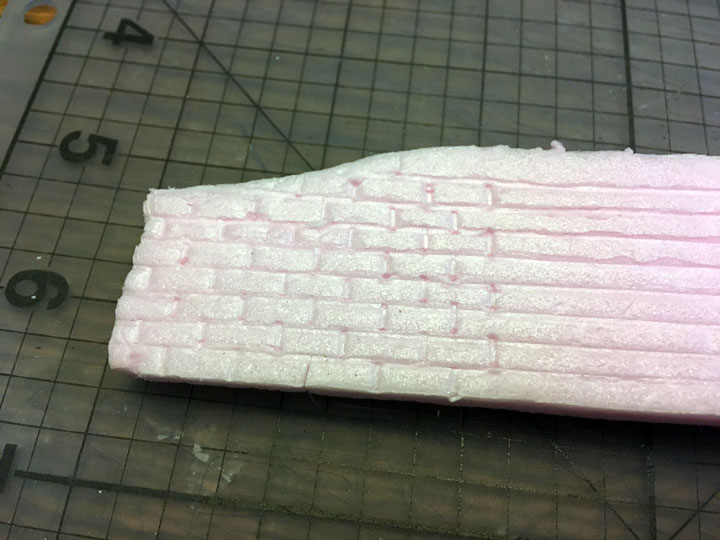
Next I used a small screwdriver to indent the vertical lines to form the stones.
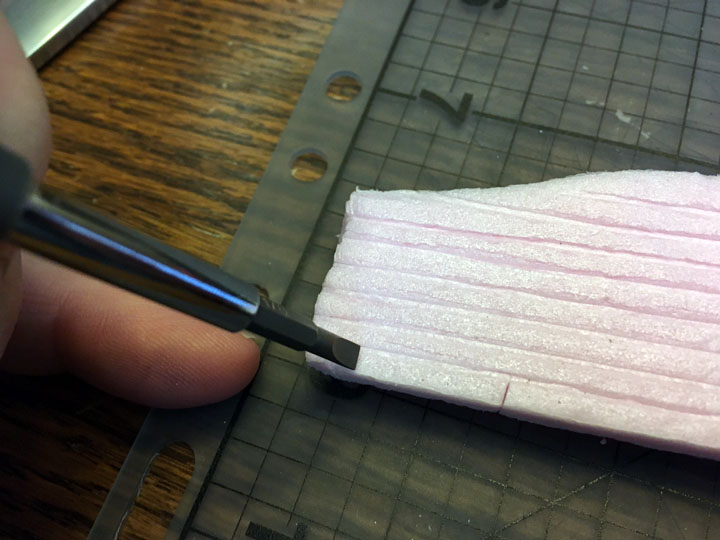
I also used the screwdriver to “dimple” the face of the stones to give some character.
I applied a base coat of dark grey acrylic craft paint using a brush.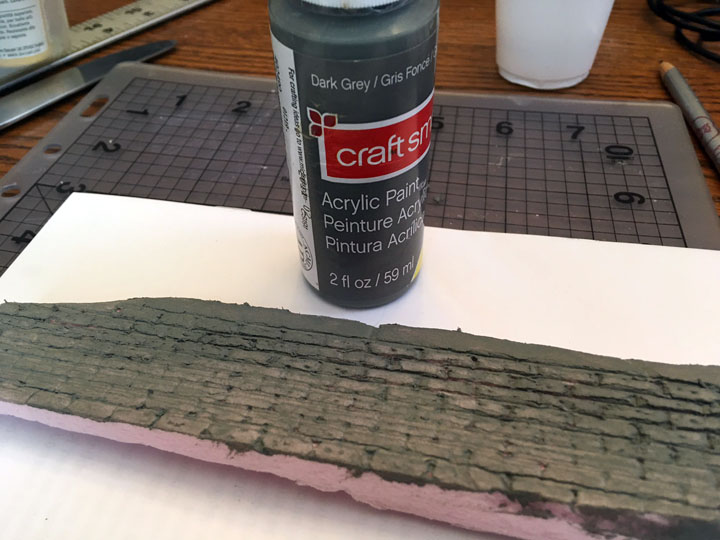
This was followed by a dry brushing of a lighter gray.
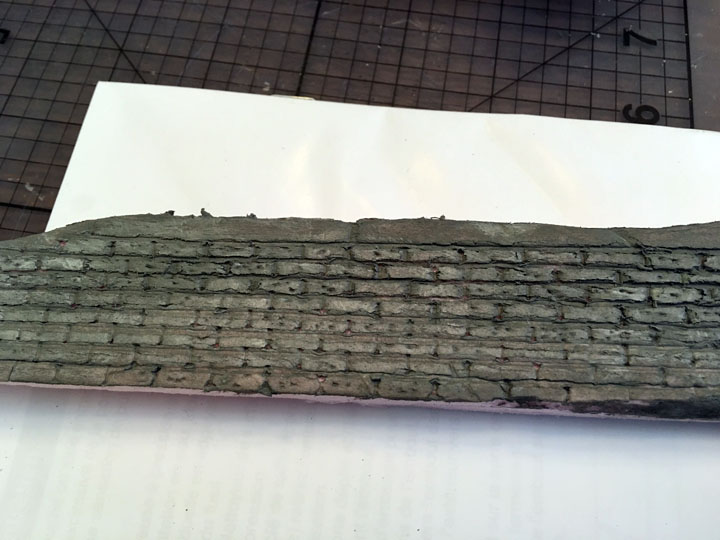
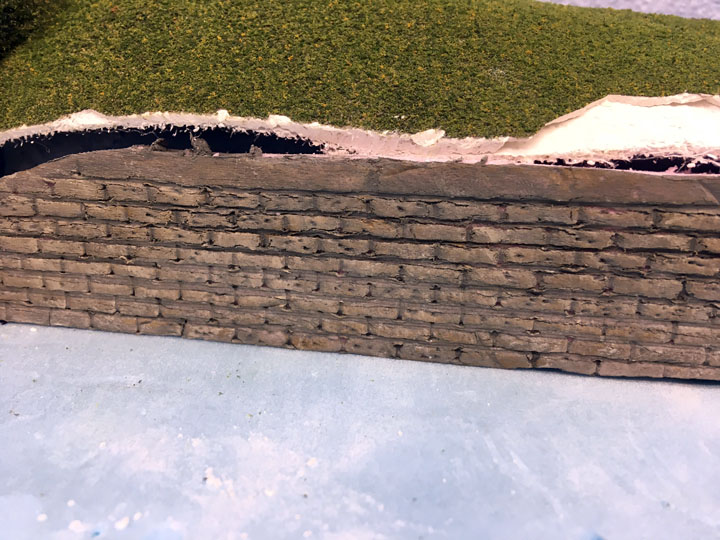
I finished up with some dry brushing of brown and tan. Here’s the finished wing wall just sitting in place.
I used the same process for the portal as I did for the wing wall
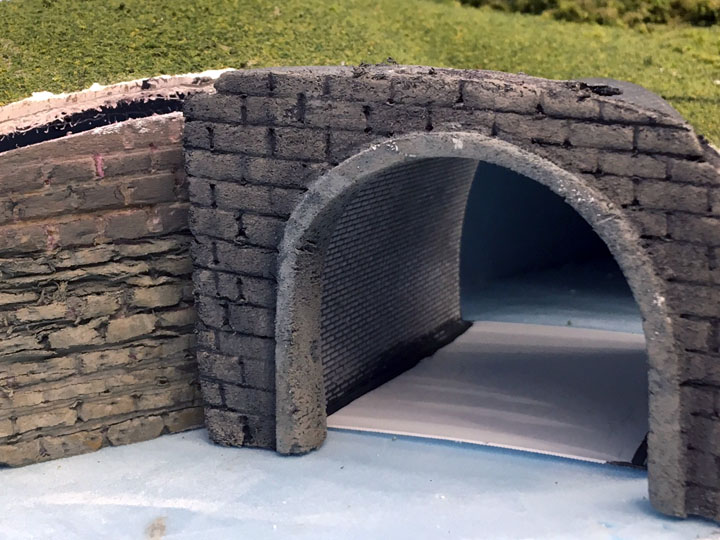
Here’s a test fit. I’ll add vines, bushes & a tree where the wing wall meets the portal along with adding stuff in front of the wing wall. If you look in the upper right inside of the portal you can see that part of the mountain is showing. I’ll need to remove that and add a tunnel liner.
Here I’ve used a marker to roughly mark where I need to cut & remove the mountain. I’ll use the same hack saw blade as before to make the cut.
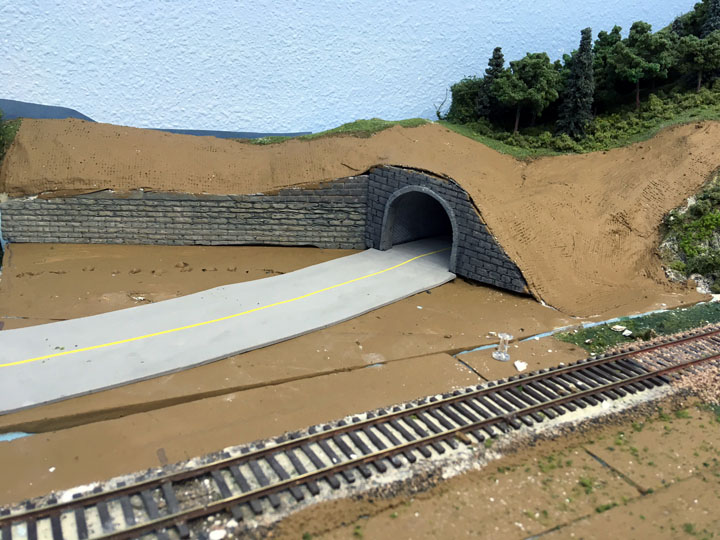
Now I have enough clearance to have a tunnel portal liner.

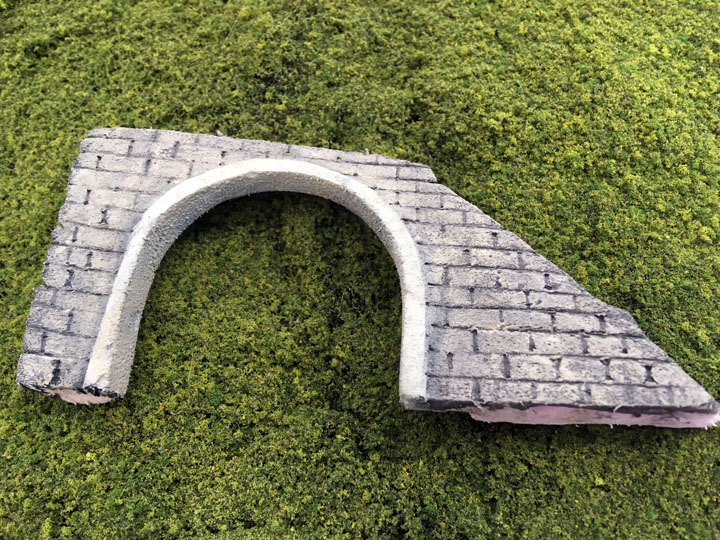
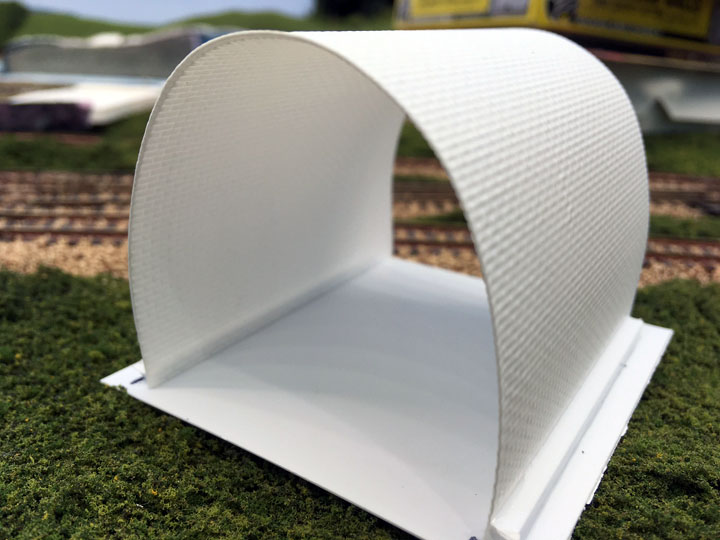
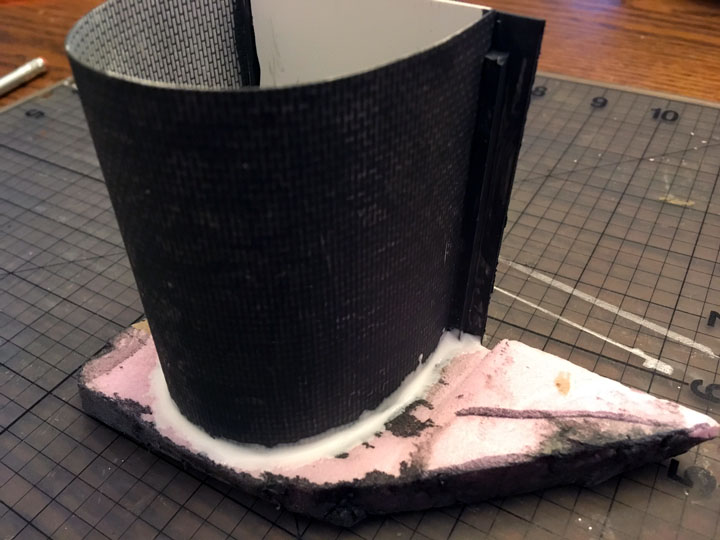
I just happened to have some white styrene brick pattern sheet. I rolled it over a sharp edge carefully to aid in creating the top curved profile. I then glued it to a styrene base to hold the curved shape.
I applied some medium gray acrylic paint with a brush and then used a paper towel and my finger to remove most of the paint before it dried. This gives it sort of a tiled look.
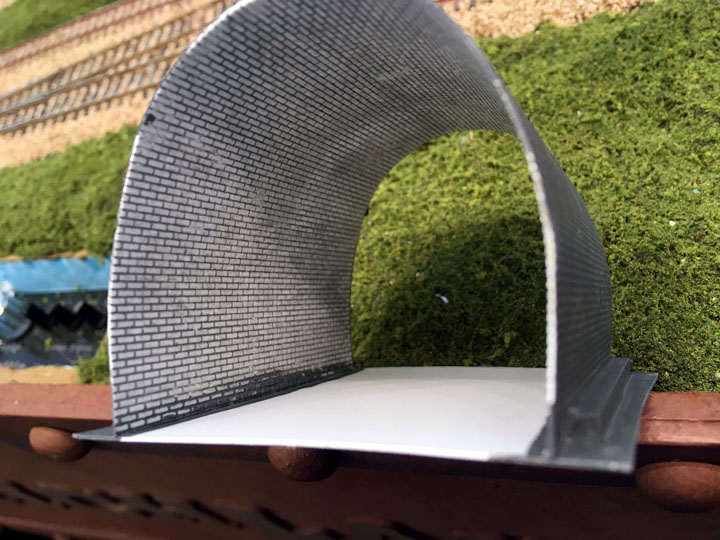
This is a test fit to see how it will look. The angle of the tunnel will be such that it can’t be viewed directly on to see that it’s a “tunnel to nowhere”.
Next I attached the tunnel liner to the portal using Aleene’s Tacky glue and set it aside to dry.
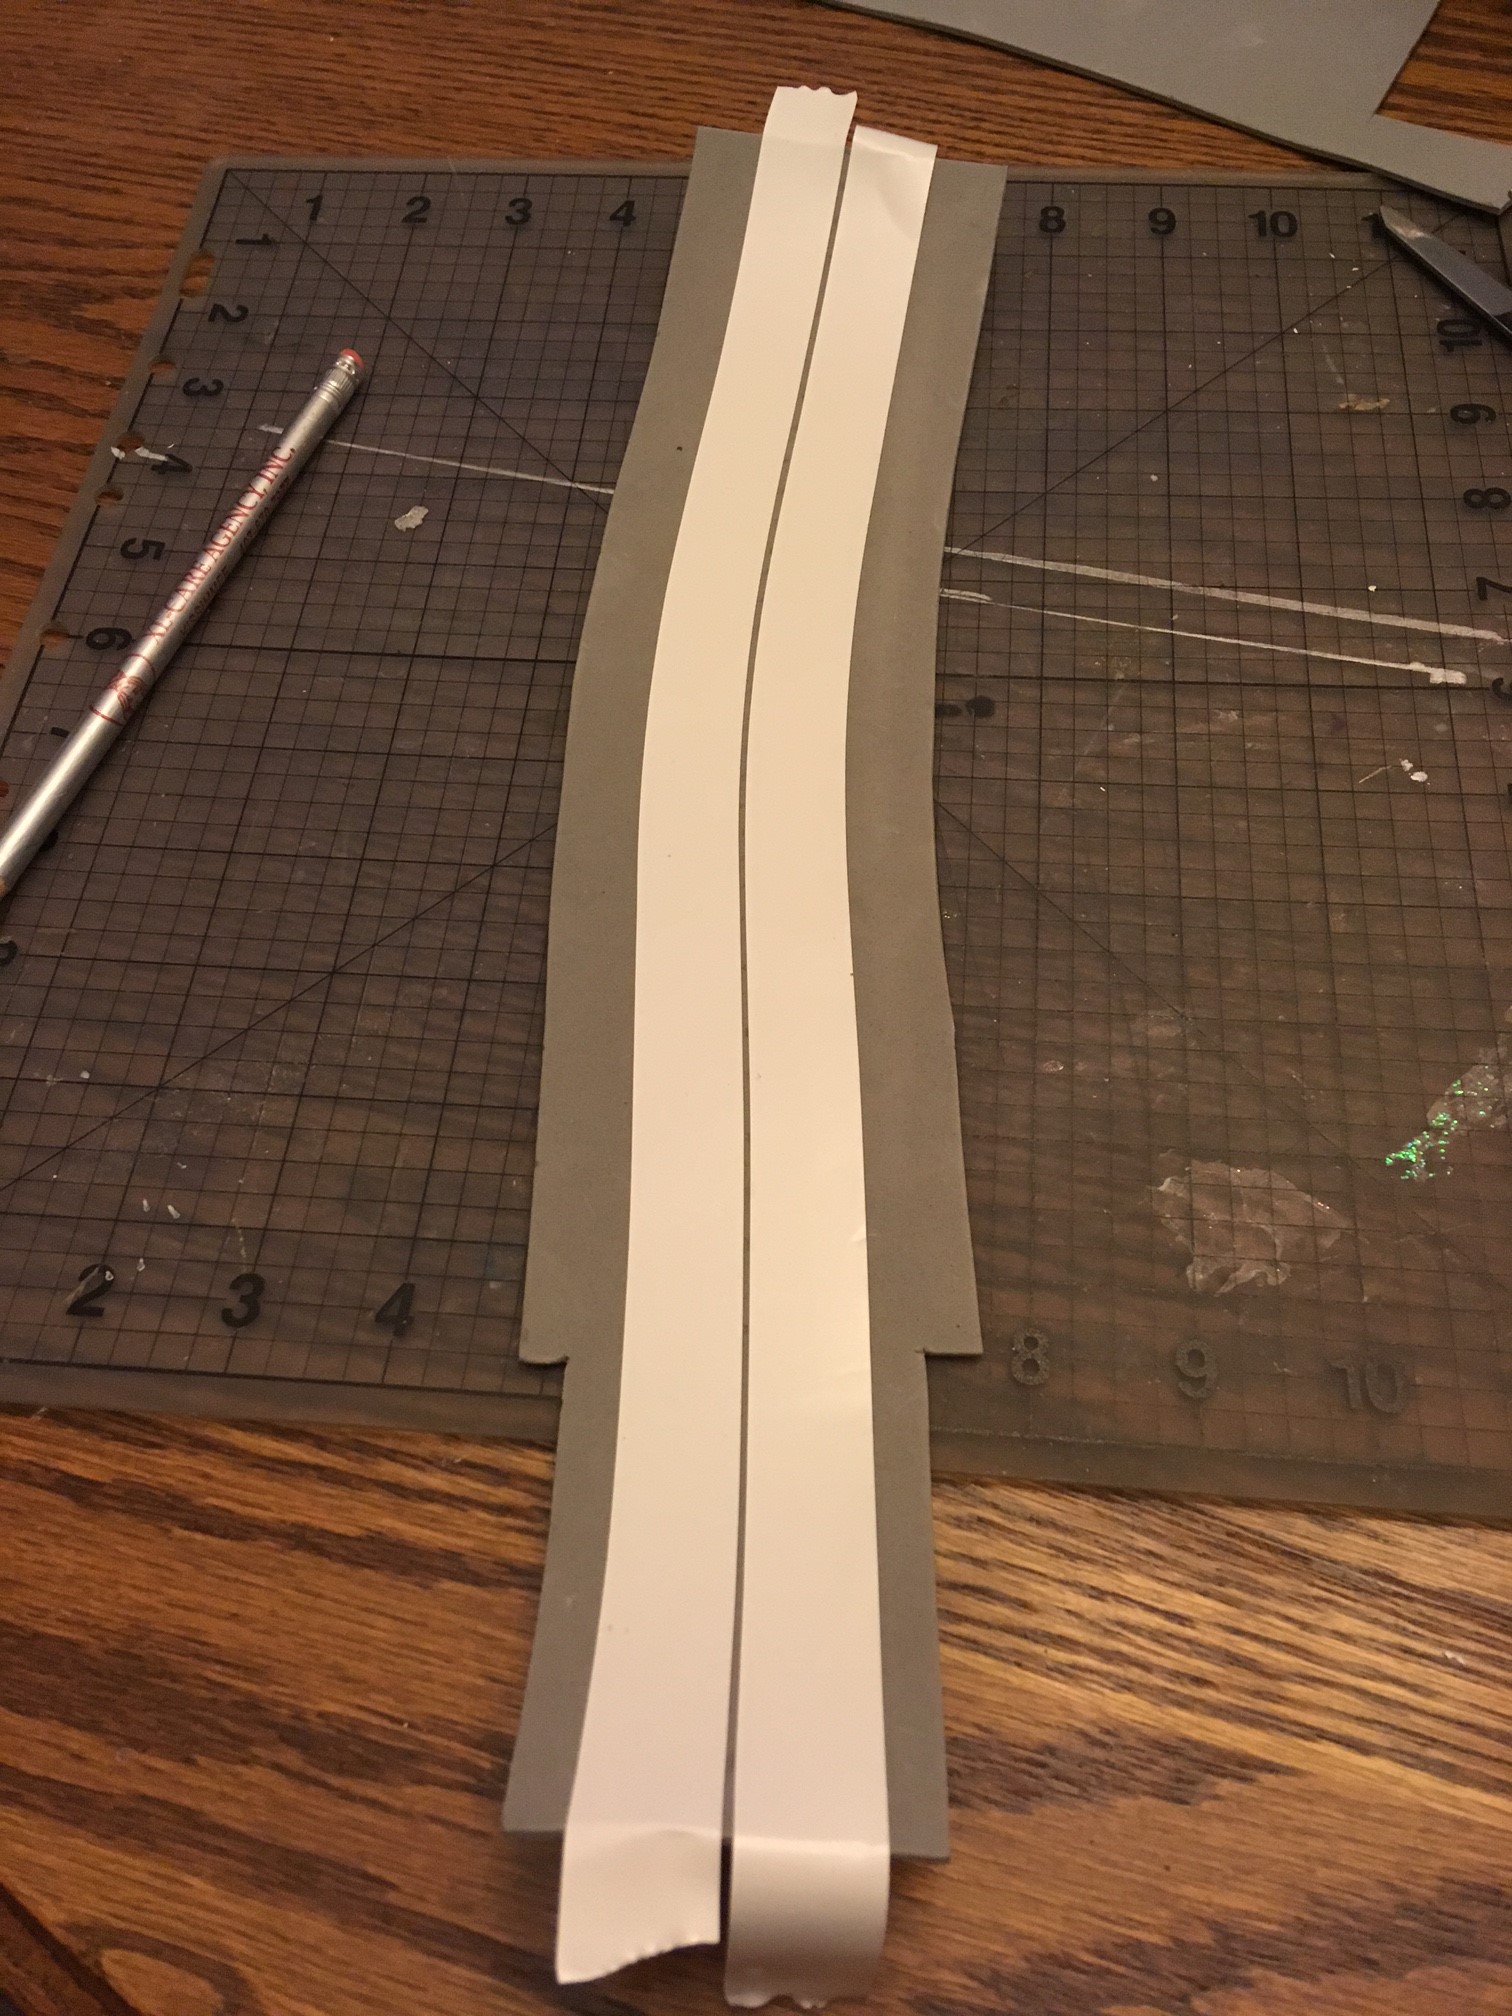
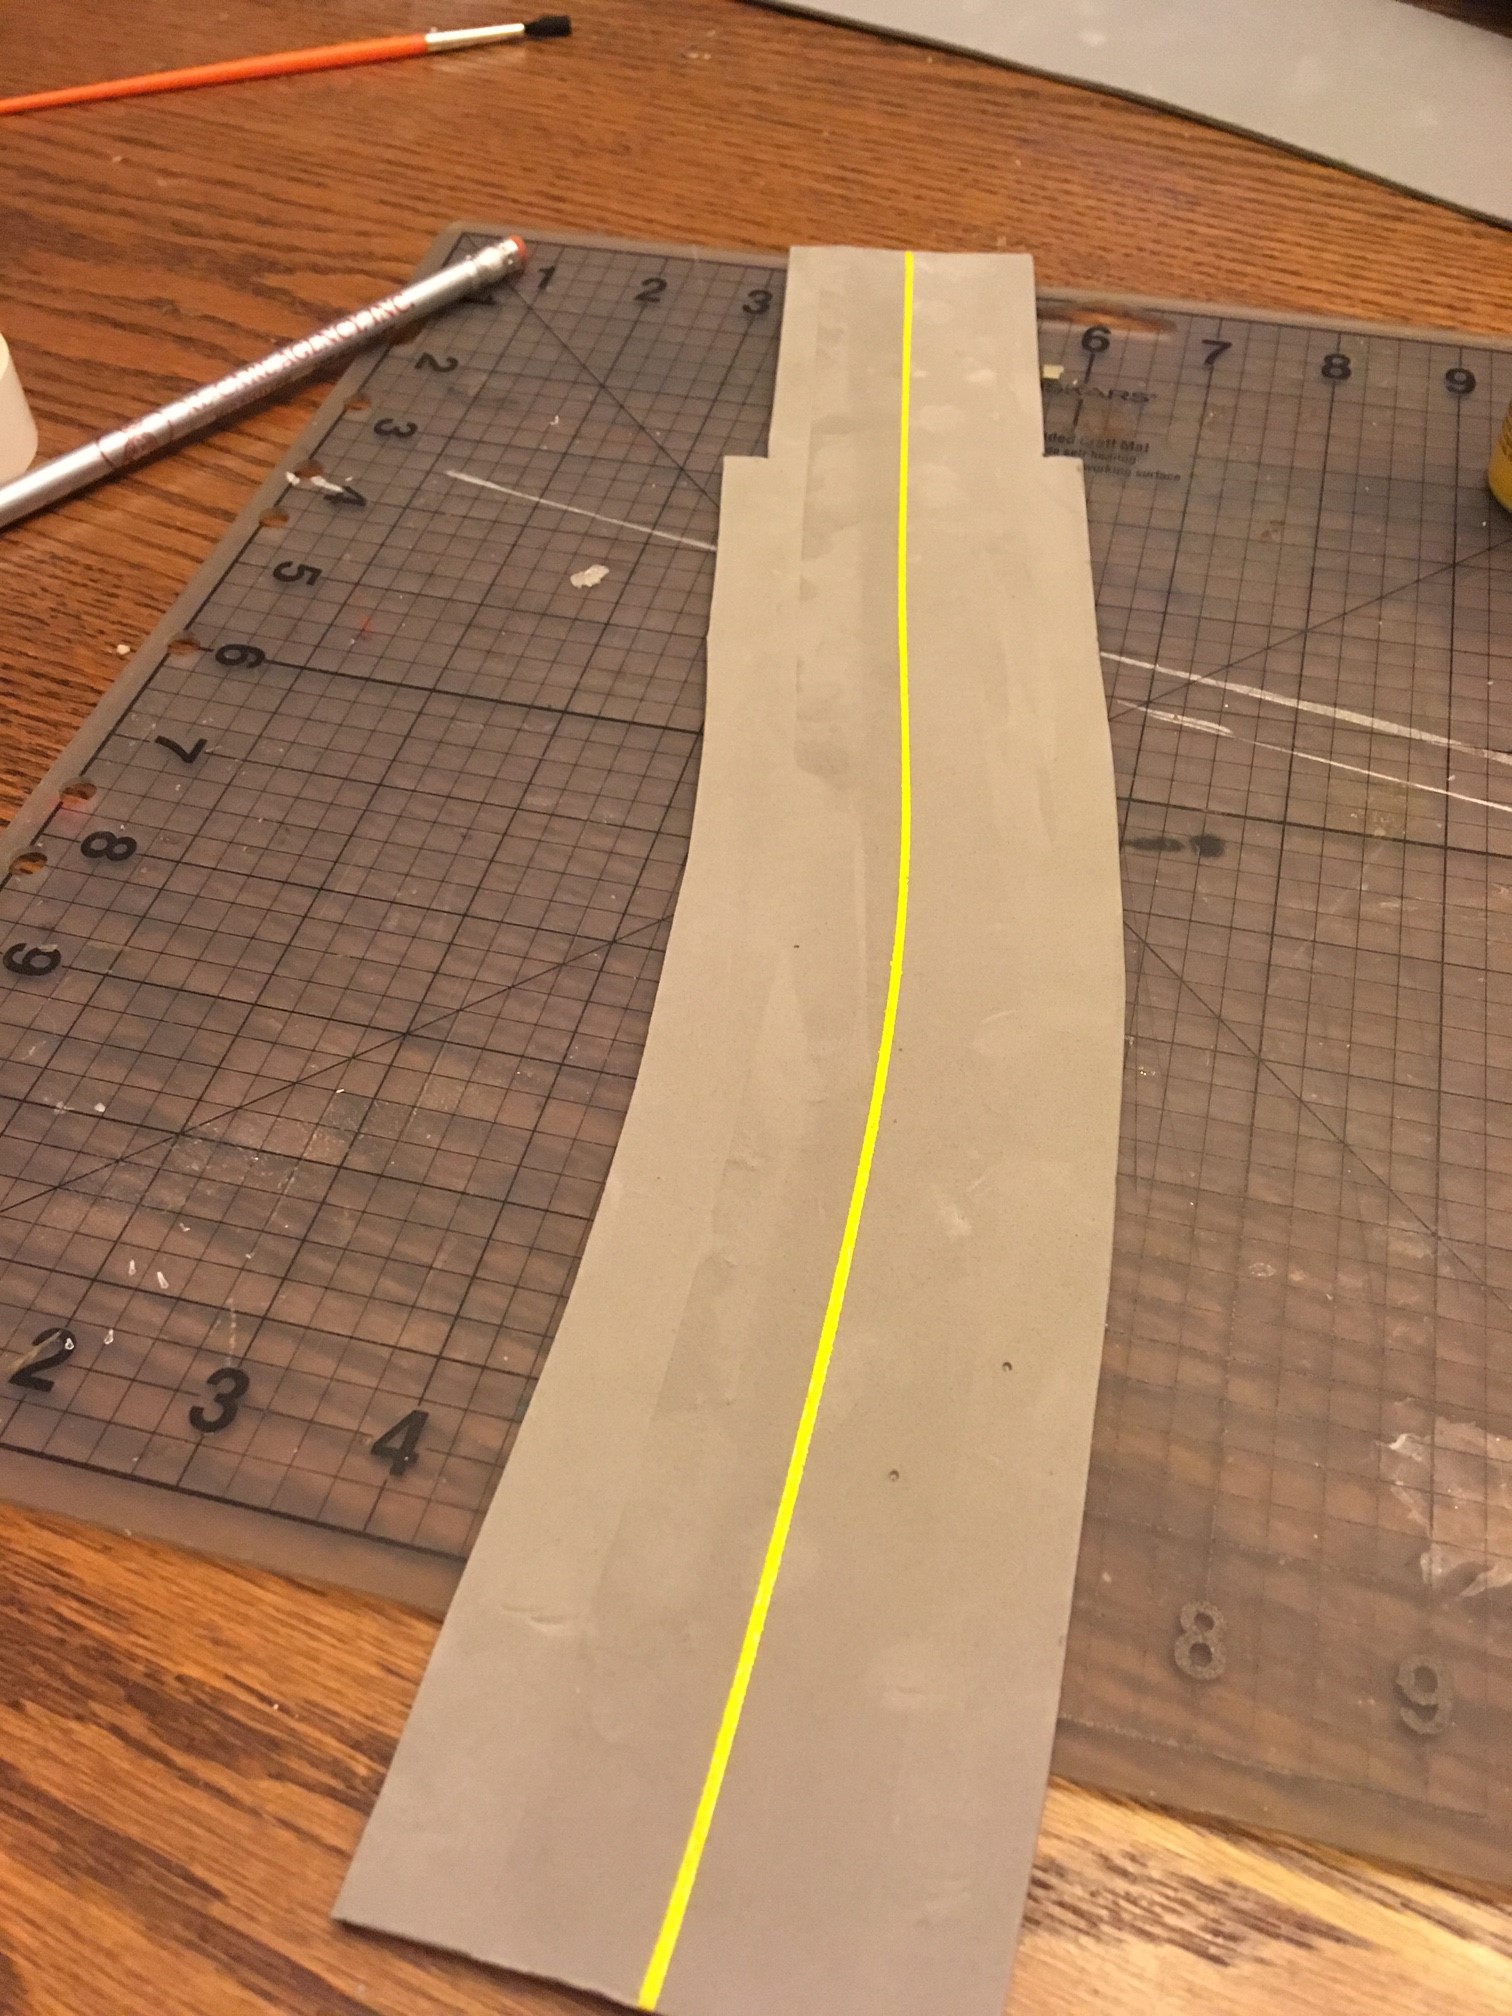
While the glue was drying I decided to work on the road that will go through the tunnel. I used gray craft foam sheets that I got from Hobby Lobby It’s 9″ x 12″ x 2mm. The sheets are also available from Jo Ann Fabrics, Amazon, and other vendors. The form sheets are easy to work with and they have a bit of a rough texture that I like. This will be a “no passing” zone so I needed to add a solid yellow line. I first marked the center of the road lightly using a number two pencil. I then used white electrical tape to mask off the area.
I painted the line using Apple Barrel E20219 “Banana” acrylic paint. I used a brush to dab it on carefully to avoid it bleeding under the tape.
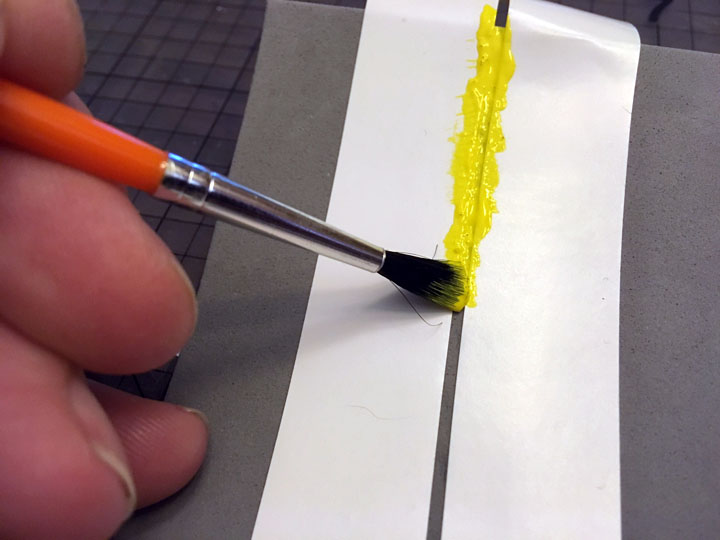
While the paint was still wet I removed the tape that I used for masking. I didn’t have any bleed under at all so I got a nice, crisp line. The yellow line will be weathered along with the road surface later.
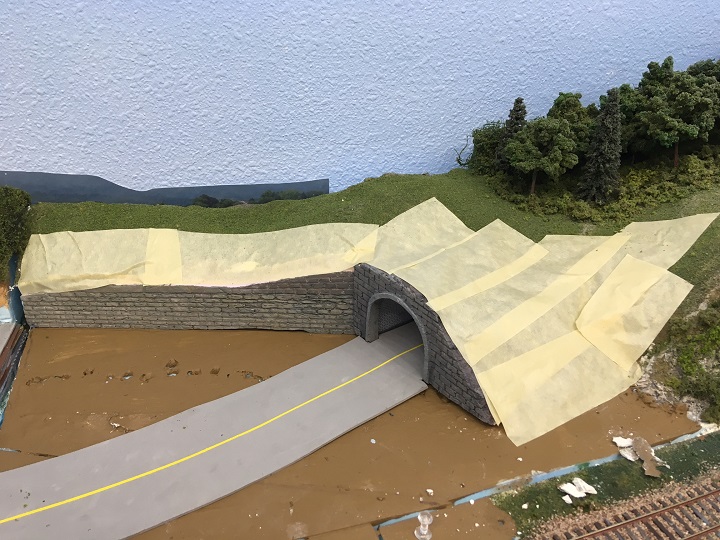
After gluing down the retaining wall and portal assembly I applied masking tape to cover the gaps and tie the pieces into the existing mountain.
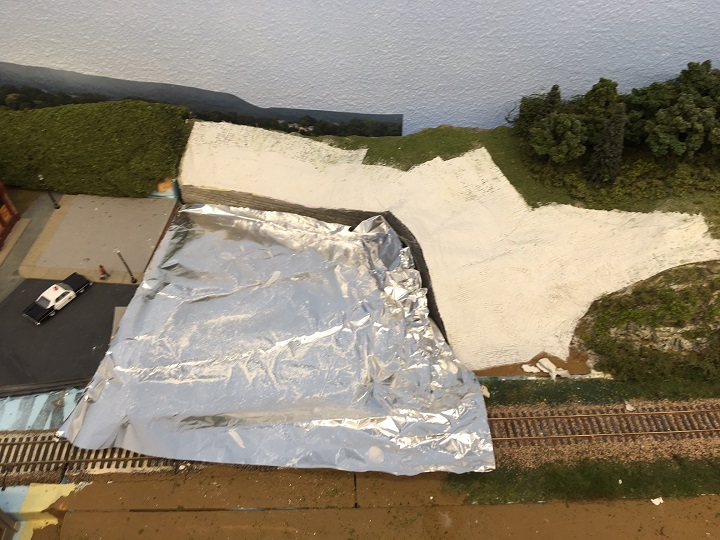
I protected the area from plaster drippings using a piece of foil. Before applying each piece of plaster cloth I folded the edge of the cloth where the cloth meets the retaining wall and portal to provide a clean edge.
Everything gets a coat of my “earth” colored brown paint.
I used 100% white glue to secure a mixture of ground foam to the mountain.
I needed to tie in the new area of the mountain with the existing so I used the same techniques to cover the area. I wanted to create a backdrop for the forest so as I’ve done before I used some furnace filter material as the base.
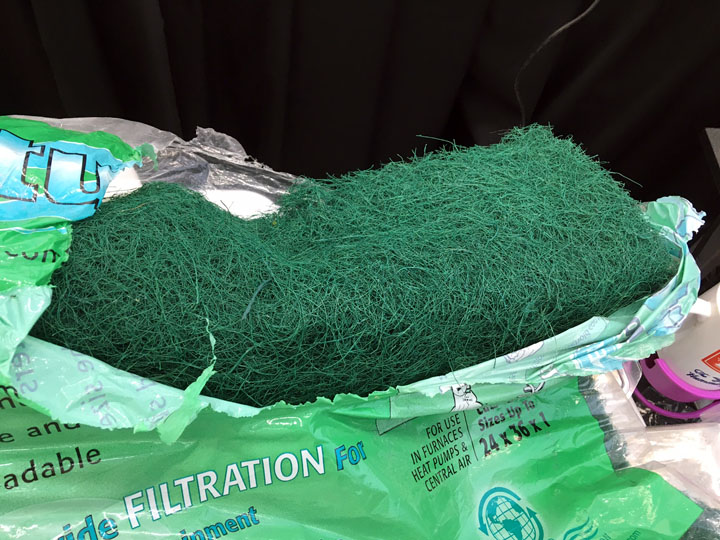
The material is a little thick so I just pulled it apart roughly in the middle of the thickness to create thinner pieces.
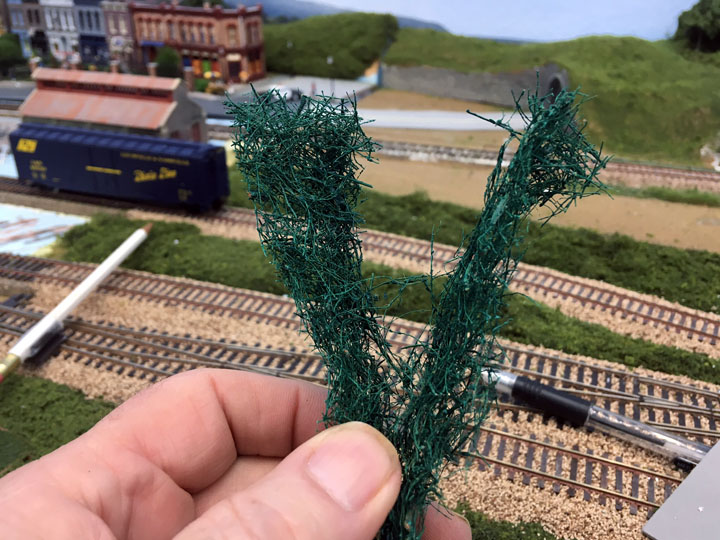
I used scissors to cut the top to make it irregular.
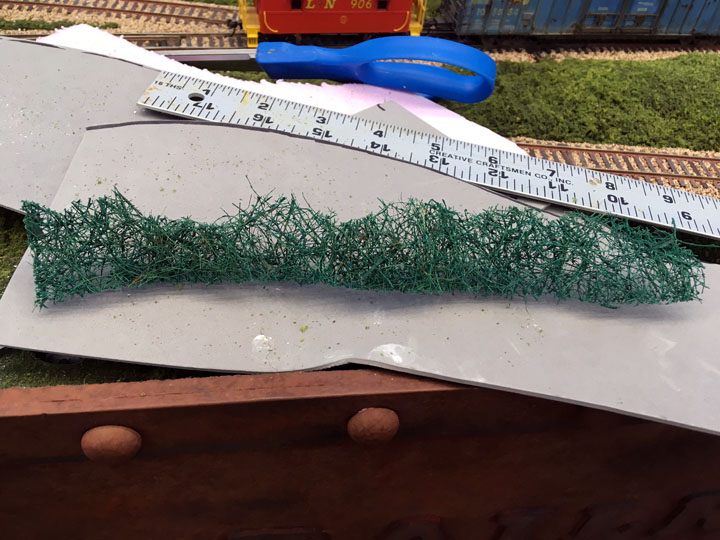
I took the pieces outside where I applied some spray adhesive and then applied my “standard” ground foam mix.
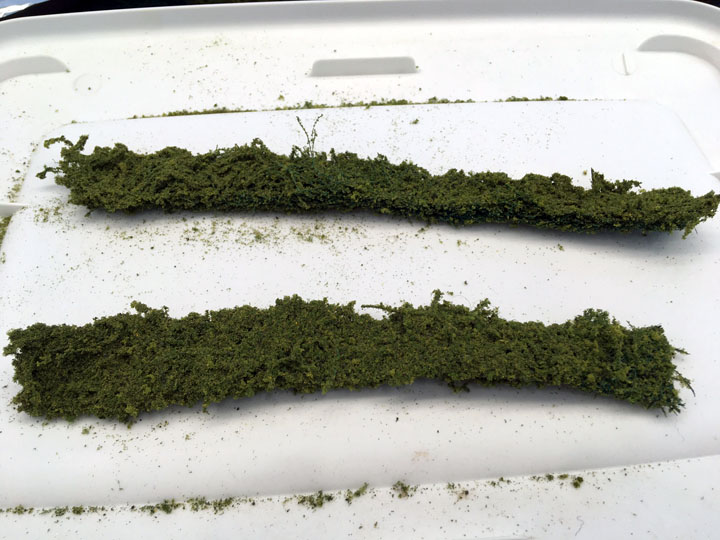
My hot glue gun made quick work of attaching the pieces to the back top edge of the mountain.
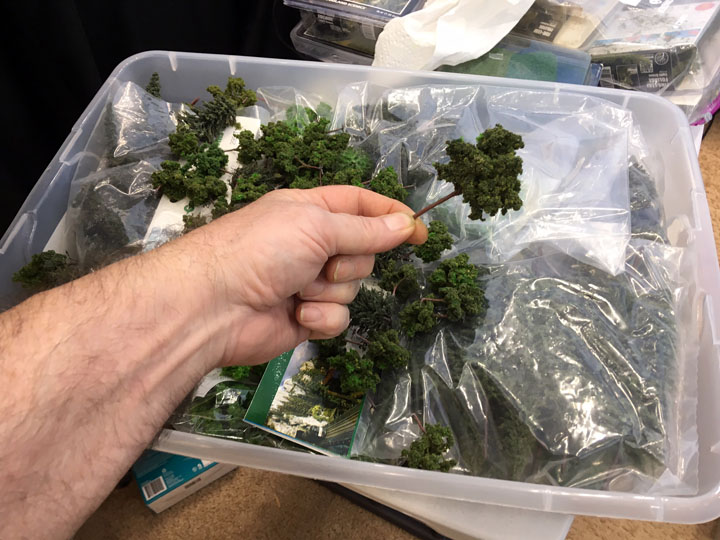
Next I got out my big old “box-o-trees” which contains ready made China trees that I’ve previously applied ground foam, Noch, Woodland Scenic(tm) trees, and Supertrees.
I use long nose pliers to slightly unravel the end of the twisted wire trees to form three “roots” which makes it easy to “plant” the trees with hot glue instead of punching holes through the plaster cloth.
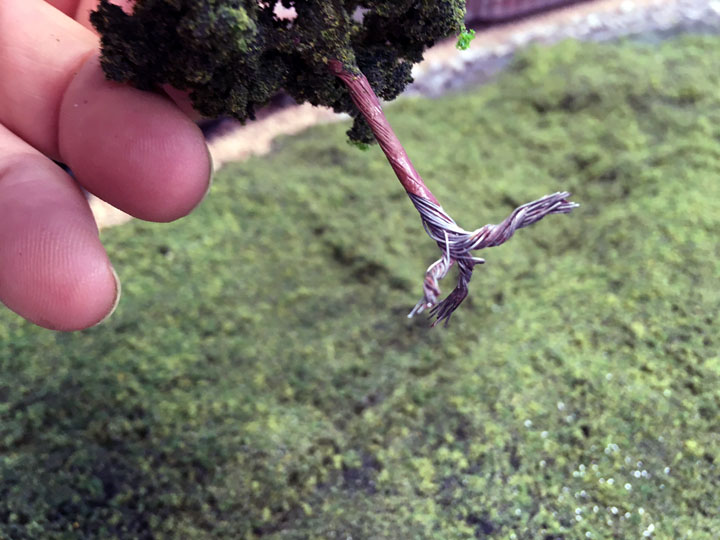
Here are a couple of the “planted” trees – and yes, the roots are visible. I’ll hide the roots with ground foam and other materials.
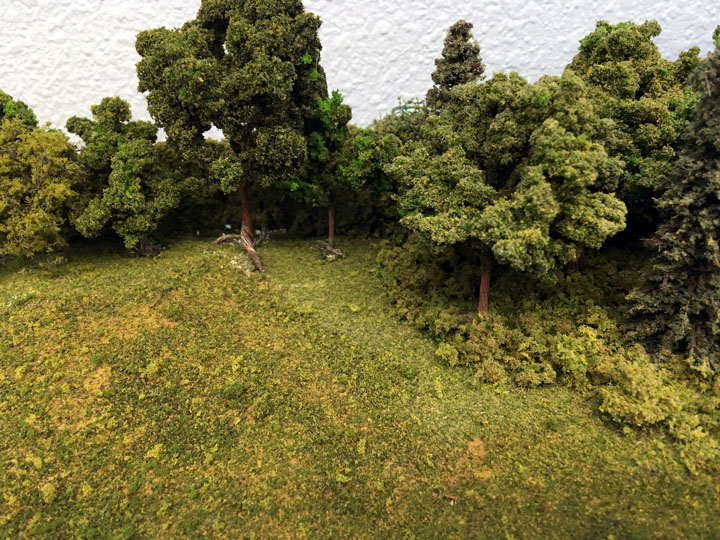
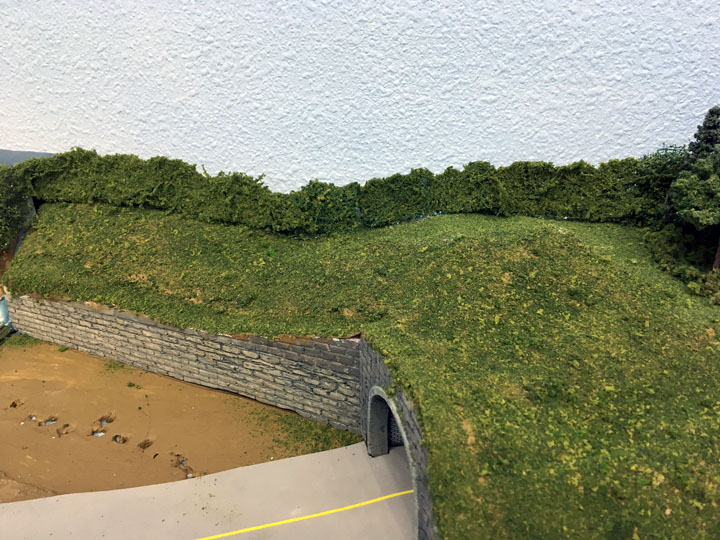
I added a BUNCH more trees, bushes, and underbrush.

Even more stuff added including stuff at the base and vines.
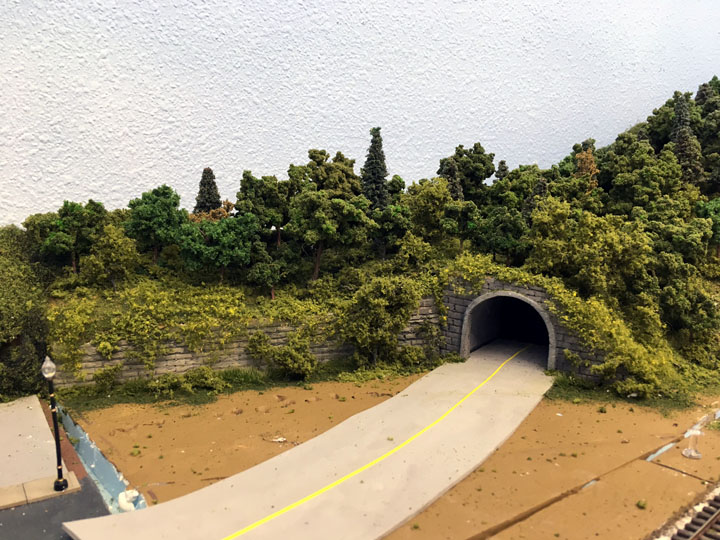 I’ve still got to finish the area after I decide what I want to put on both sides of the road. I’ll also weather the road.


